Standing Desk Ergonomics: How to Set Up Your Desk, Monitor, and Posture

A standing desk is one of the best upgrades you can make to your workspace. But a standing desk set up badly can leave you with the same sore neck and tight shoulders you were trying to escape, just from a different angle.
The good news is that standing desk ergonomics isn't complicated. A few measurements, a couple of habits, and maybe one or two accessories are enough to make both your sitting and standing positions comfortable for the whole day.
This guide walks you through the full standing desk setup, from desk height to monitor position to how you actually stand, and finishes with a quick checklist you can run through in five minutes.
Why Standing Desk Ergonomics Matters
As we covered in our guide to standing desk health benefits, the benefit of a sit-stand desk comes from alternating, not from standing all day. But alternating only helps if each position is a good one. A desk that's too high pushes your shoulders up; a monitor that's too low pulls your head forward. Good ergonomics makes every posture in your rotation neutral and relaxed, so changing position feels like a relief instead of a trade-off.
How to Find the Right Standing Desk Height
Desk height is the foundation of everything else. Get it right first, then adjust the rest around it.
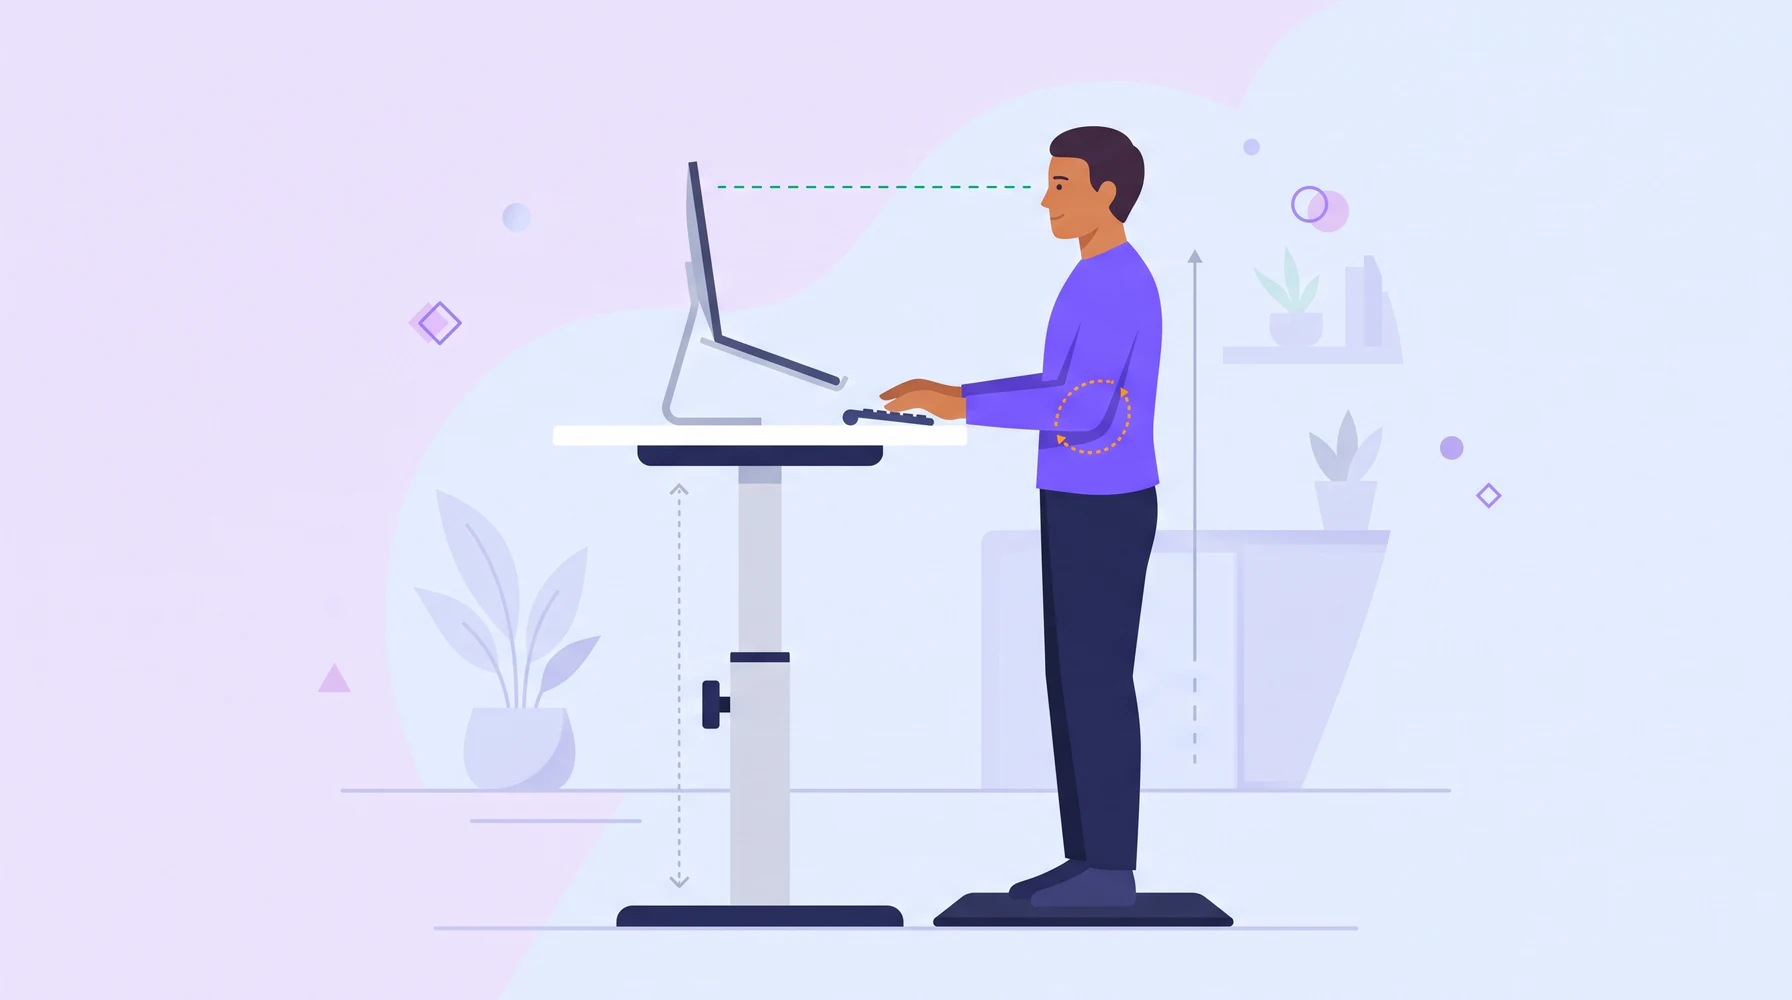
Standing desk height when standing
- Stand in front of the desk in the shoes you normally wear while working.
- Let your arms hang relaxed at your sides, shoulders down.
- Bend your elbows to about 90 degrees, forearms roughly parallel to the floor.
- Raise or lower the desk until the keyboard surface sits at or just below elbow height.
Your wrists should stay straight and neutral, not bent up or down while you type. If you find yourself shrugging, the desk is too high. If you're hunching or reaching down, it's too low.
Desk height when sitting
The same principle applies when you sit:
- Adjust your chair first (more on that below), so your feet are flat on the floor.
- With elbows at about 90 degrees and shoulders relaxed, lower the desk until the keyboard is at or slightly below elbow height.
- Check that your thighs have some clearance under the desk and you're not bumping your knees.
Save both heights as desk presets
Most electric standing desks can store memory presets. Once you've found your sitting and standing heights, save them: one button press instead of guessing every time. The easier it is to switch, the more often you'll do it. No presets? A piece of tape on the leg or a note of the height works too.
Monitor Height and Distance
After desk height, your monitor position has the biggest effect on your neck and upper back.
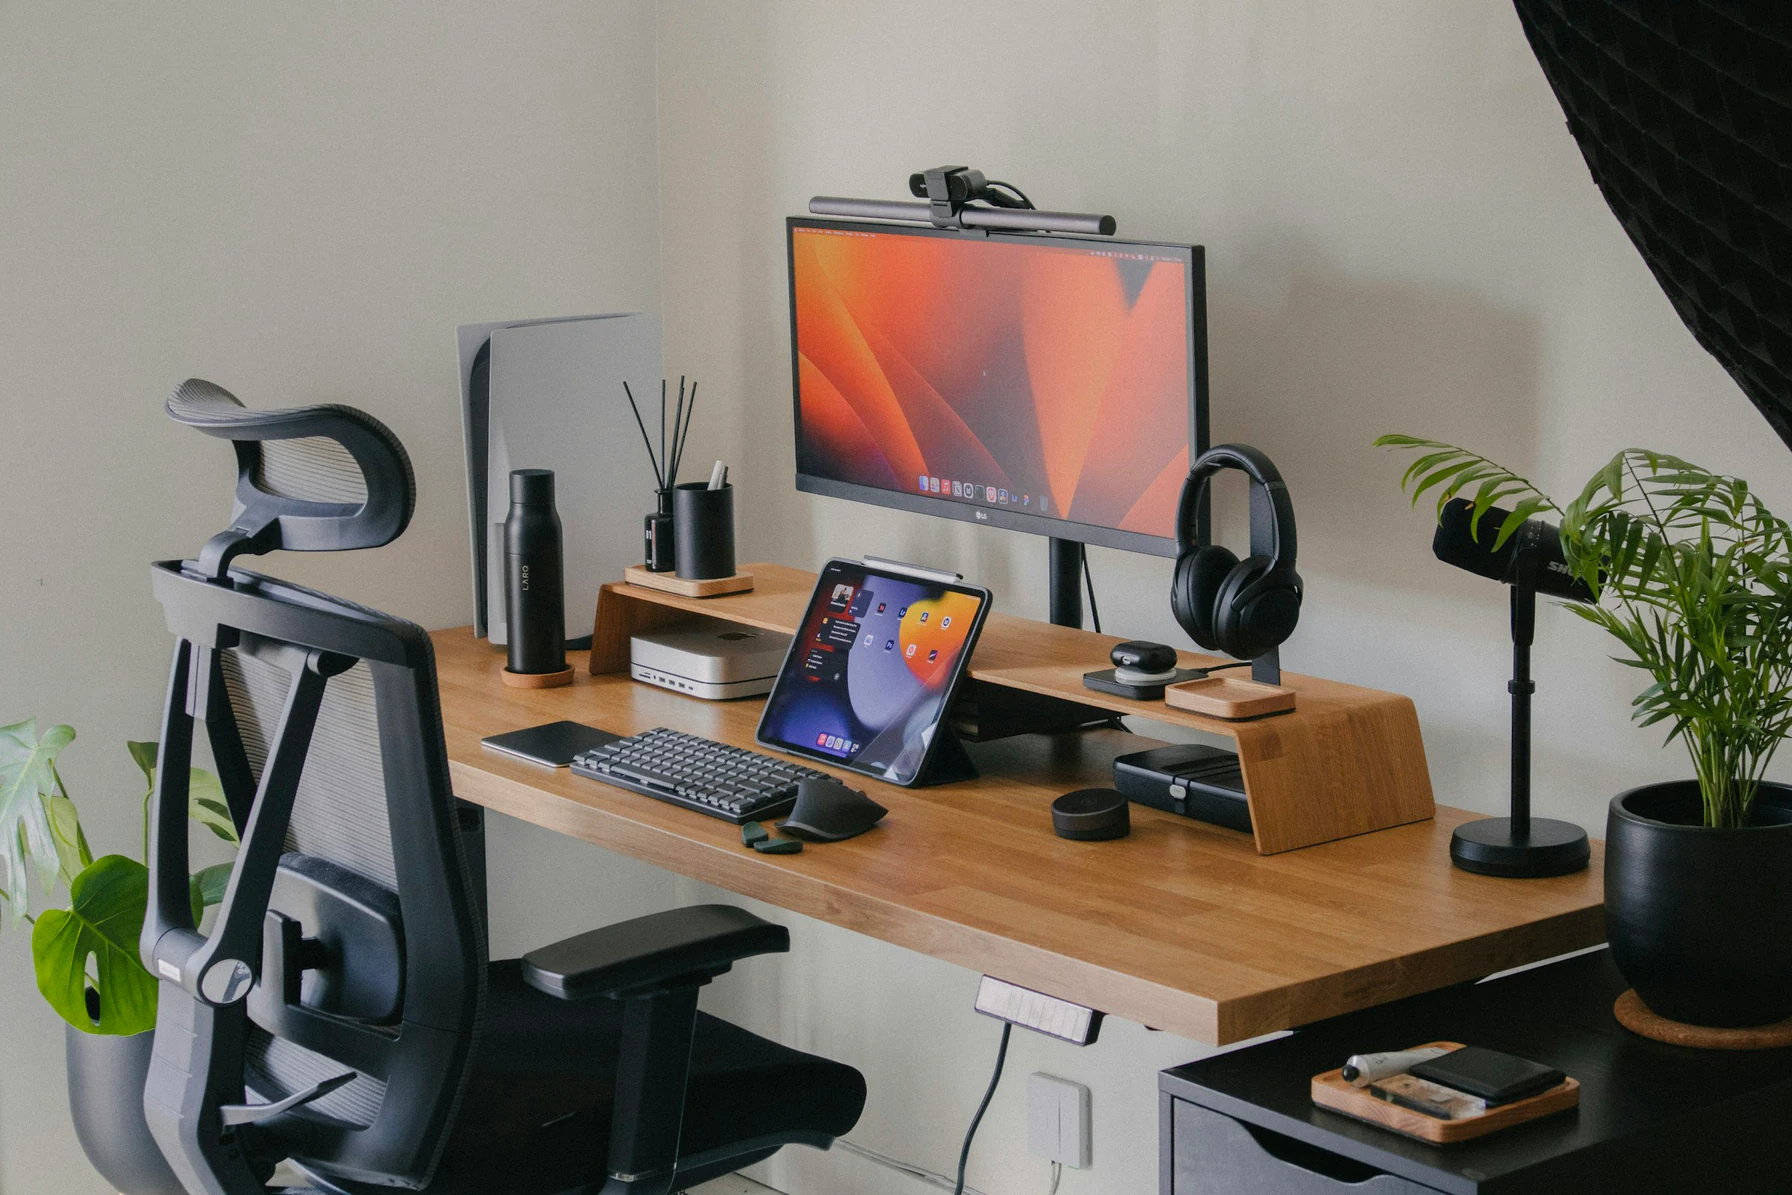
Photo by Nubelson Fernandes on Unsplash
Correct monitor height
A widely used guideline, shared by ergonomics resources such as Cornell's and OSHA's, is to place the top of the screen at or slightly below eye level, so you look straight ahead or slightly down and your head stays balanced over your shoulders.
- Progressive lenses or bifocals? Set the monitor a bit lower so you don't tilt your head back.
- Large or ultrawide monitors may need to sit lower so the center of the screen stays comfortable.
- Tilt the screen back slightly so it faces your eyes.
Monitor distance
Start with the screen at about an arm's length away. Sit or stand normally, extend your arm, and your fingertips should land roughly at the screen. Then adjust for comfort: if you're leaning in to read text, move it closer or increase the font size; if you need to turn your head to see the edges, move it back.
Keep the monitor height right in both positions
Does your monitor move with the desk when you raise it? If it sits on a separate stand or wall mount, you'll need to adjust it every time you switch. A monitor arm clamped to the desk is one of the most worthwhile sit-stand accessories: it moves with the desk and lets you fine-tune height in seconds.
Keyboard and Mouse Placement
- Place the keyboard directly in front of you, close enough that your elbows stay near your sides.
- Keep the mouse right next to the keyboard, at the same height. Reaching out to the side for the mouse all day strains the shoulder.
- Try to keep the keyboard flat or with a very slight negative tilt; extending the feet at the back of the keyboard tends to bend the wrists upward.
- A wrist rest can help during pauses, but try not to anchor your wrists on it while typing.
Laptop Users: Avoid the Hunch
A laptop on its own is an ergonomic compromise: when the keyboard is at the right height, the screen is too low. The fix is simple and inexpensive: raise the laptop on a stand until the top of the screen is near eye level, and use an external keyboard and mouse at elbow height. If you work from a laptop most days, this is probably the most important change you can make.
Correct Standing Desk Posture
With the desk and screen in the right place, the next step is how you stand. Correct standing desk posture isn't about standing rigidly at attention. It's about being balanced and relaxed.
A standing posture checklist
- Weight on both feet. Distribute your weight evenly instead of sinking into one hip.
- Soft knees. Keep a slight bend; avoid locking your knees straight.
- Neutral pelvis. Don't push your hips forward or arch your lower back.
- Shoulders relaxed and down, not rounded forward or shrugged.
- Head over shoulders, eyes looking straight ahead at the top third of the screen.
- Don't lean on the desk with your forearms or elbows for long stretches.
Standflow's interval labels are a good shorthand for each posture. Standing is described as "Weight on both feet", sitting as "Feet flat, back supported", perching as "Half-sit on a tall stool", and moving as "Walk, stretch, refill your water". They're small cues, but reading them every time an interval starts is a useful reminder to reset your posture.
Keep moving while you stand
Standing still is not the goal. Shift your weight from time to time, change your foot position, or rest one foot on a low footrest or bar and alternate sides. Small movements keep blood flowing in your legs and make standing sessions feel much shorter.
Footwear and Anti-Fatigue Mats
What's under your feet matters more than most people expect.
Choose supportive shoes
Stand in comfortable, supportive shoes with some cushioning. High heels, very flat dress shoes, or standing barefoot on a hard floor can make even a short standing session uncomfortable.
Use an anti-fatigue mat
An anti-fatigue mat is a cushioned mat that encourages small, constant adjustments in your feet and legs. Many people find it makes standing noticeably more comfortable, especially on hard floors. Look for firm cushioning (supportive, not mattress-soft), beveled edges so you don't trip, and enough size to shift your stance. Contoured mats with bumps or ridges invite you to change foot position, which fits nicely with the idea of not standing still.
Set Up Your Chair for Sitting Phases
Sitting is still part of a healthy routine, so your chair deserves the same attention:
- Feet flat on the floor (or on a footrest), knees at roughly hip height.
- Back supported by the backrest, with lumbar support in the curve of your lower back.
- Seat depth that leaves a small gap between the front edge of the seat and the back of your knees.
- Armrests low enough that your shoulders stay relaxed, or out of the way if they push your arms up.
If you have a tall stool or a leaning seat, you can add a third position: perching, a half-sit that sits between sitting and standing and takes load off your legs without collapsing your posture.
Turn Your Setup Into a Routine
A perfect setup is only half of the story. The other half is actually changing position throughout the day, and that's the part that's easy to forget once you're focused.
This is where a timer helps. Standflow lives in your macOS menu bar and cycles through sitting, standing, and optional perching and moving intervals that you configure. If you're not sure where to start, the presets give you a good baseline: Easy Start (a 30-minute cycle), Balanced (60 minutes), or Posture Trio (90 minutes, with perching and moving). You can reorder intervals, adjust each duration, and choose whether the next interval starts automatically or waits for you to confirm, with options to stay a few more minutes or get reminded later.
If you're wondering how long each position should last, our post on the best sit-stand schedule covers that in detail.
Quick Standing Desk Setup Checklist
Run through this once, then revisit it whenever something starts to feel off:
- Standing height: keyboard at or just below elbow height, elbows at ~90°, wrists straight.
- Sitting height: same elbow angle, feet flat, knees clear of the desk.
- Both heights saved as desk presets (or marked).
- Monitor top at or slightly below eye level, about an arm's length away, slightly tilted back.
- Monitor height correct in both positions (a monitor arm helps).
- Keyboard and mouse close together, directly in front of you.
- Laptop raised, with an external keyboard and mouse.
- Supportive shoes and an anti-fatigue mat for standing.
- Chair adjusted for sitting phases, with lower back support.
- A reminder to switch positions regularly.
Frequently Asked Questions
How high should my standing desk be?
When standing, your desk should put the keyboard at or slightly below elbow height, with your elbows bent at about 90 degrees and your shoulders relaxed. The exact number depends on your height and shoes, so measure it with your own body rather than relying on a chart.
What is the correct monitor height for a standing desk?
The top of the screen should be at or slightly below eye level, roughly an arm's length away. Make sure it stays at that height in both sitting and standing positions; a desk-mounted monitor arm makes this easy.
Do I really need an anti-fatigue mat?
It isn't required, but many people find standing much more comfortable with one, especially on hard floors. If your feet, knees, or lower back get tired quickly when standing, a mat and supportive shoes are a good first fix.
Is it bad to lean on my standing desk?
Occasional leaning is fine, but resting your weight on your forearms or on one hip for long stretches can strain your shoulders and lower back. If you're leaning a lot, it may be a sign to switch to sitting, perching, or a short walk.
What should I do if I still feel pain after adjusting my setup?
Ergonomic adjustments help many people, but they're not a replacement for medical advice. If you have persistent pain, numbness, or discomfort, talk to a doctor or physical therapist who can look at your specific situation.
Conclusion
Good standing desk ergonomics comes down to a few fundamentals: the right desk height for each position, a monitor at eye level, a keyboard and mouse within easy reach, and a relaxed, balanced posture. Add supportive shoes or an anti-fatigue mat and a simple routine for switching positions, and your desk will work with your body instead of against it.
Take ten minutes today to run through the checklist.